This is part - 2 of the firebase authentication series, previously we have seen how we can use Google authentication in our application.
This will be connected to that as well, here we'll just add another method of authentication to our app. So, do check out the previous articles before continuing here as we're going to use the previous example to save time and implement multiple authentication types in our application.
Get Started
firebase configuration
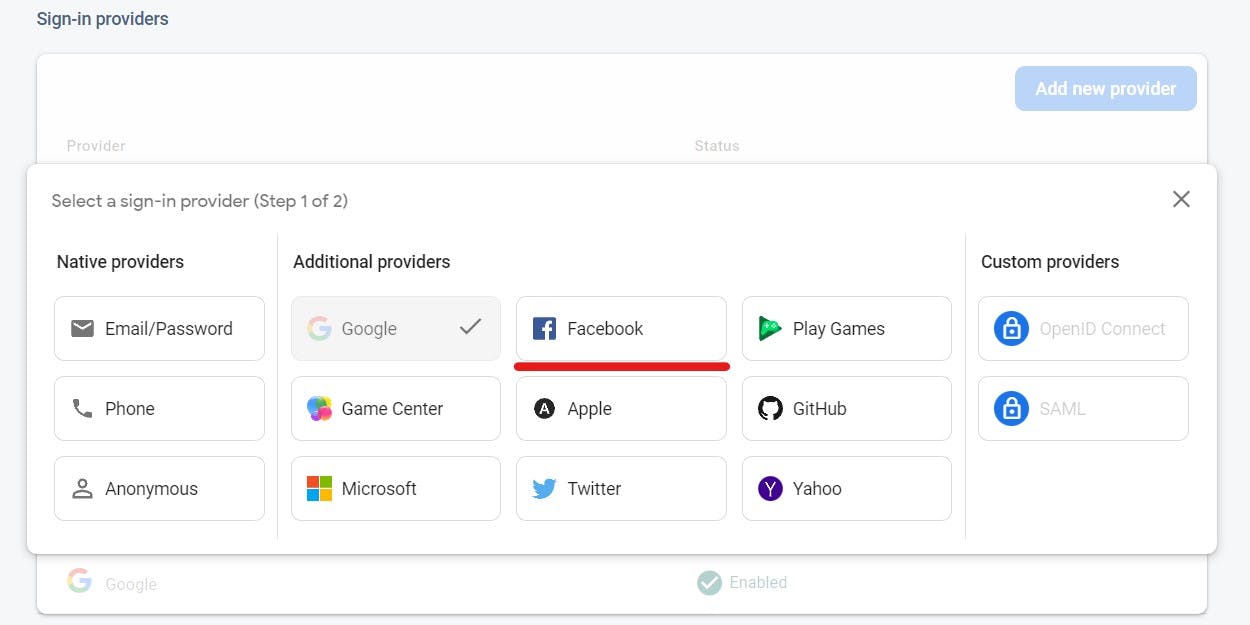
Click on Add new provider and add Facebook.


We need the App ID and App Secret for that goto Facebook developer.
Login with your Facebook account.
Then click on Create App and choose consumer.
Add your App Name and click on Create App and enter your password.
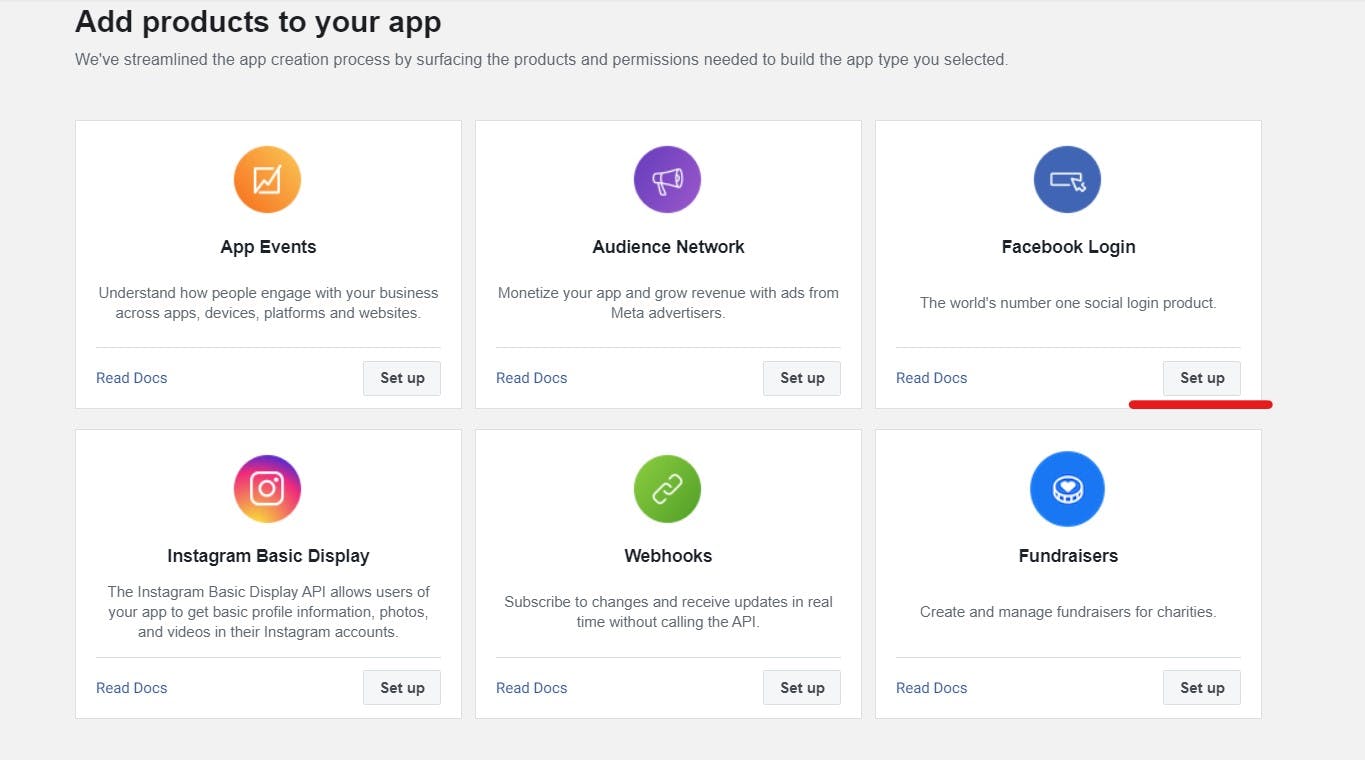
Click on Set up under Facebook login and then select web.

Then put a site URL, you can put any URL, i.e., example.com, and then save it.
Now go to Settings and click on basic and copy the App ID and App Secret.
Now paste it into your firebase console and save it and you'll see Facebook is enabled.

Code
AuthContext
Here we're going to add another authentication provider that is provided by firebase, FacebookAuthProvider. We won't be making many changes to the application that's why we're using previous code examples, see the previous blog.
import { useContext, createContext, useEffect, useState } from "react";
import {
    GoogleAuthProvider,
    FacebookAuthProvider,
    signInWithPopup,
    signOut,
    onAuthStateChanged,
} from "firebase/auth";
import { auth } from "../firebase";

const AuthContext = createContext();

export const AuthContexProvider = ({ children }) => {
    const [user, setUser] = useState({});

    const googleSignIn = () => {
        const provider = new GoogleAuthProvider();
        signInWithPopup(auth, provider);
    };

    // This function provides facebook login authentication
    const facebookSignIn = () => {
        const provider = new FacebookAuthProvider();
        signInWithPopup(auth, provider);
    };

    const logOut = () => {
        signOut(auth);
    };

    useEffect(() => {
        const unsub = onAuthStateChanged(auth, (currentUser) => {
            setUser(currentUser);
            console.log(currentUser);
        });
        return () => {
            unsub();
        };
    }, []);

    // update the value of AuthContextProvider with our new login method.
    return (
        <AuthContext.Provider
            value={{ facebookSignIn, googleSignIn, logOut, user }}
        >
            {children}
        </AuthContext.Provider>
    );
};

export const UserAuth = () => {
    return useContext(AuthContext);
};
Signin page
Now add another button on the sign-in page for Facebook login.
import React, { useEffect } from "react";
import { UserAuth } from "../context/AuthContext";
import { useNavigate } from "react-router-dom";

const Signin = () => {
    const { facebookSignIn, googleSignIn, user } = UserAuth();
    const nav = useNavigate();

    const handleGoogleSignin = async () => {
        try {
            await googleSignIn();
        } catch (error) {
            console.log(error);
        }
    };

    // add a function to handle facebook signin
    const handleFacebookSignin = async () => {
        try {
            await facebookSignIn();
         } catch (error) {
             console.log(error);
         }
    };

    useEffect(() => {
        if (user != null) {
            nav("/account");
        }
    }, [user]);

    return (
        <div className="signin">
            <button onClick={handleGoogleSignin}>Sign in with Google</button>
            <button onClick={handleFacebookSignin}>
                Sign in with Facebook
            </button>
        </div>
    );
};

export default Signin;
This is all you need to change to your previous app to enable Facebook authentication in your existing application.
Conclusion
In this article, we saw how we can integrate Facebook login into our existing application to provide multiple authentication methods to users.
I hope that this was helpful to you, drop a like, comment and follow for more such blogs in the future, you can follow me on Twitter as well. Next will be authentication using GitHub.
Thank You :)
